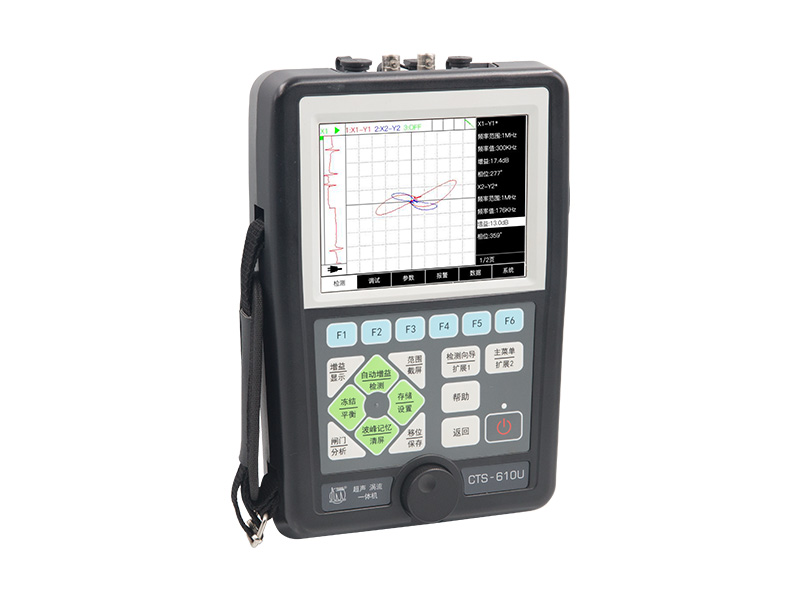


We converges the cutting-edge Ultrasonic Testing technology, eddy current technology, digital electronic technique and microcomputer technique into one advanced and portable eddy current instrument—the CTS-610U. It can provide the combined flaw inspection of ultrasonic technology and eddy current technology, achieving the comprehensive inspection of outside and inside defects of the parts.
We converges the cutting-edge Ultrasonic Testing technology, eddy current technology, digital electronic technique and microcomputer technique into one advanced and portable eddy current instrument—the CTS-610U. It can provide the combined flaw inspection of ultrasonic technology and eddy current technology, achieving the comprehensive inspection of outside and inside defects.
Fitted with the high-resolution color LCD, the CTS-610U is suitable for outdoor operation. The instrument is equipped with the intelligent low-power power management system, and the high-performance lithium battery is mounted to it to allow long-term work for about 5hrs. The instrument weighs only 1.7kg, designed for site inspection of army, petrochemical, pressure vessel, electric power, railway industry.
Utilizes the cutting-edge Ultrasonic Testing technology, eddy current technology, digital electronic technique and microcomputer technique
Combined flaw inspection of ultrasonic testing and eddy current testing, achieving the comprehensive inspection of outside and inside defects
Fitted with the high-resolution color LCD & Suitable for outdoor operation
Intelligent low-power power management system & High-performance lithium battery, allowing long-term work for about 5hrs
- Weighs only 1.7kg, designed for site inspection of army, petrochemical, pressure vessel, electric power, railway industry
| Display | 5.7 inch hight-brightness color TFT display (resolution: 640x480) |
| Probe Ports | 2 Q9 Probe Port; 1 LEMO ET Probe |
| Other Ports | Encoder Port, mini HDMI Port, USB Port |
| Storage | Internal 32G |
| Weight | 1.7kg |
| Dimensions | 251.5mm×171mm×62.5mm (length×width×height) |
UT | |
| Attenuator Error | Per 12dB±1dB |
| Equivalent Input Noise | <80×10-9V/HT |
| Pulse Type | Negative square wave; transmitting voltage -50V~-250V; tunable, per step of 50V |
| Work Method | Single/ Dual |
| Damping | 400Ω, 80Ω |
| Frequency | 0.5~20MHz |
| Gain | 0.0~110.0dB with per step of 0.1, 1.0, 2.0, 6.0dB |
| Velocity Range | 1000~10000m/s, continuously tunable, pre-set 30 sound velocity parameters of common materials |
| Test Volume | 0.0~10000mm (steel longitudinal wave) continuously tunable with minimum step of 0.1mm |
| Rectification | Positive/Negative/Full/RF |
| Gates & Alarms | 2 gates optional: positive alarm/negative alarm/DAC curve alarm; sound and visual alarms; peak/front |
| Display | 5.7 inch color LCD (640×480) |
| Pulse Shift | -7.5~3000us |
| Probe Zeroing | 0~999.9us |
| PRF | 25~800Hz |
| Vertical Linearity Error | ≤3% |
| Horizontal Linearity Error | ≤0.3% |
| Sensitivity Surplus | ≥60dB(200Φ2 flat-bottom hole,2.5P20) |
| Resolution | ≥36dB(5P14) |
| Dynamic Range | ≥32dB |
| Rejection | (0~90)% no detriment to the linearity and gain |
| Noise Level | ≤10% |
| Standard | EN12668-1; JB/T 10061-1999; TSG21-2016 |
| ET | |
| Channels | 1 |
| Frequencies | 2 |
| Voltage | 8 settings |
| Manual Phase | 0~359°(with per step of 1°) |
| Gain | 10~90dB(with per step of 1dB) |
| Sampling Frequency | 40MHz/12bit |
| Filtering | Digital filter |
| Alarm | Amplitude and Phase (9 alarm areas; impedance plane diagram1:A/B/C, impedance plane diagram2: D/E/F, impedance plane diagram3: G/H/I |
| Probe Type | Bridge/ D_P |
| Display Method | Time-based/ impedance plane |
| Balance | Digital balance |
| Display | 5.7 inch (680×480) color TFT display |
| Storage | Storage/replay/analyze the signal waveform of the whole inspection process |
| Analyze | Analyze the signal waveform of the whole inspection process; auto-measurement of phase and amplitude; mixing the waveform of impedance plane diagram 1 and 2. |


